My initial experience with hugulkulture beds has been amazing. I’m now on my third year and am starting to see some AMAZING vegetable production. The first raised beds I put in were 18” tall and sat on top of clay soil. When our HOT summers hit I noticed that the beds were drying out and I had to water more than usual. So this fall I set out on a mission to hugul these beds. My goals for this were simple:
1. Dig down 2’ below grade so I would have 42” of of soil to work with
2. Reduce watering needs by creating an insulated cavity for the wood
3. Mix in a boat load of grass clippings and leaves
4. Create trenches on the edges of each bed so water could funnel down to the wood when it rains
So with these goals in mind I started digging out my old beds. Removing the top 18” of dirt was super easy. But when I hit clay my excitement went out the window. Our red clay was hard and compacted which made digging a pain. Drenching the clay with water made digging a bit easier but the excavation process took much longer than anticipated. Here is a picture of one of my beds half way through the “big dig”:
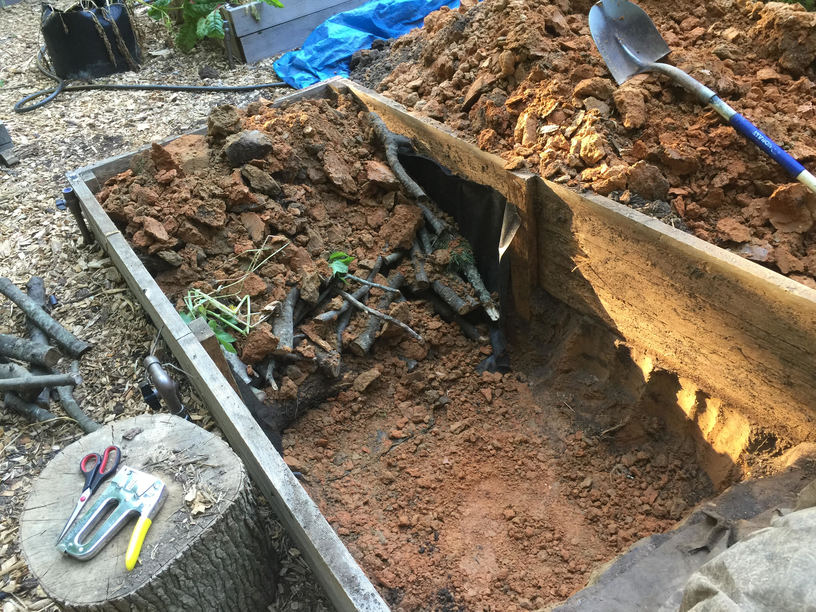
To minimize work I filled half of the bed with wood and organic material and used the clay (mixed 50⁄50 w/ the original soil) from the other side to back fill the hugul’ed side. This saved a good amount of time. Once the beds were refilled I added a liberal amount ofJohn & Bob’s fertilizer as well as some endo and exto mycorrhizae. I’m planning to grow perennials (leeks, green onions, etc.) in one bed and the other will be used for seasonal vegetables. Now to enjoy the fruits of my labor!